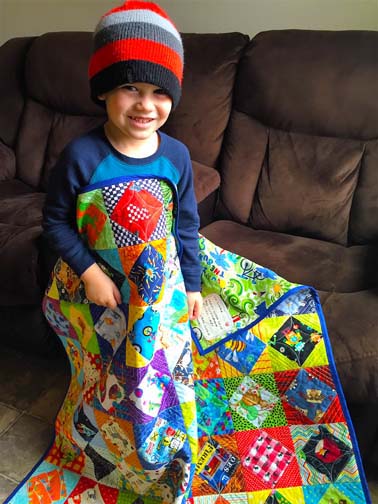
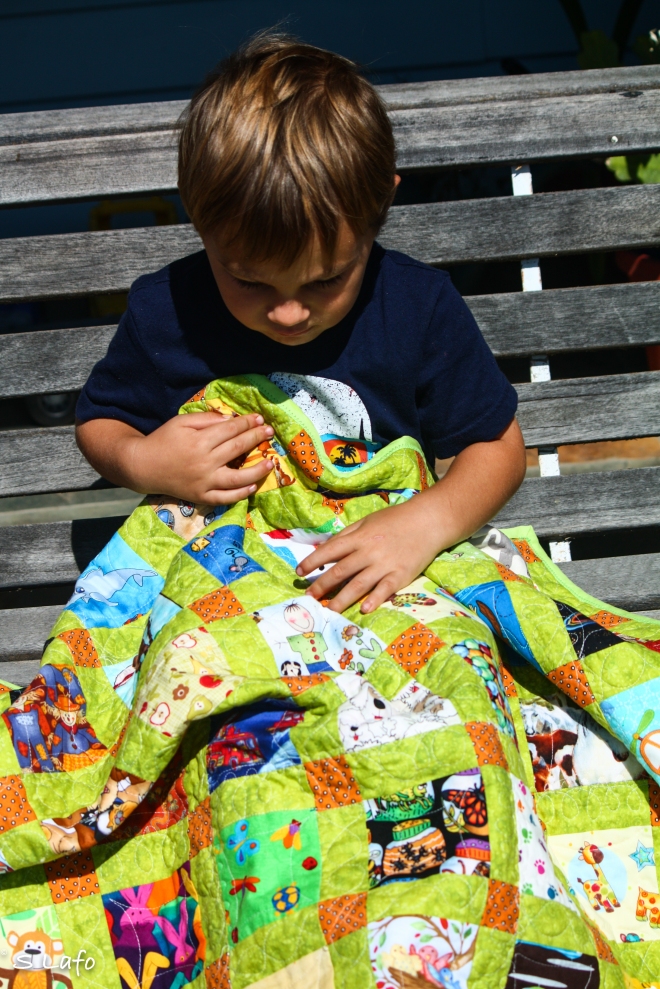
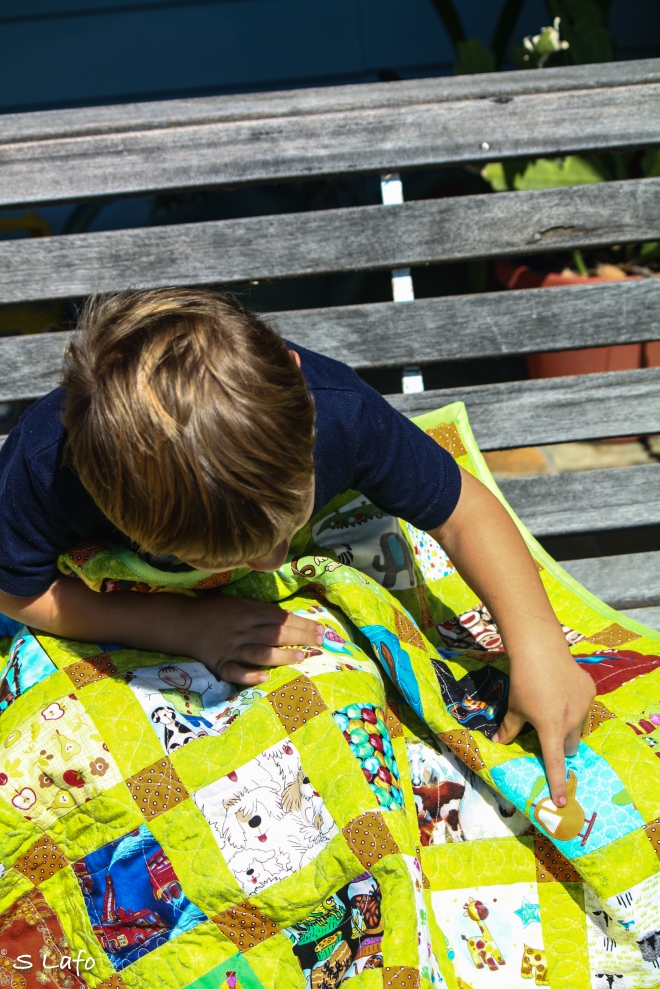
I Spy with my little eye…… Hurray! I finally finished one of the four I spy quilts I’ve been working on. This one was finished just in time for Luke’s Christmas present. He’s in love with it. Don’t you just love the bright colors?
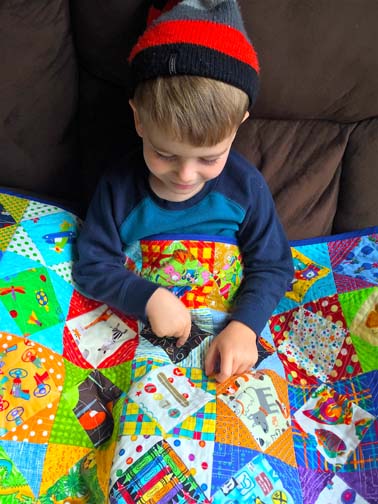
I had such fun playing I Spy with both Luke and Nathan, his 2 years old cousin, when we kept them over New Year’s. Luke finds the letters. I’m in the midst of quilting Nate’s now. He was not happy when Luke left our house with the quilt.
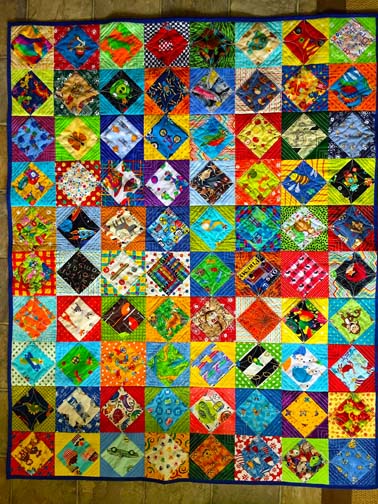 This was my very first Quilt-as-you-go quilt. Love, love, love that technique. So nice to just quilt a few squares at a time, then join. I didn’t use any particular pre-quilt template, just made it up as I went along.
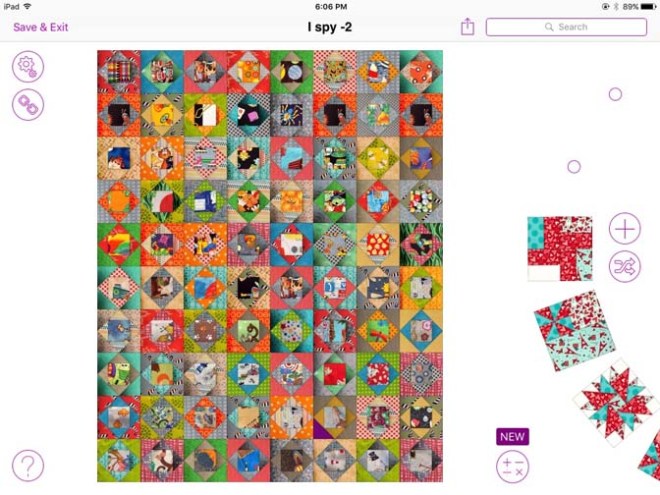
The quilt was designed using my favorite quilting app, Quiltography. See more about my much loved app from this post. The first I Spy design had a double layer of fabric around the center square.
I have to admit that I got tired of taking pictures of the plain fabrics which went around the center, I Spy squares so I started reusing the same ones. The final quilt did not use any repeating fabric. Except for the I Spy squares, I wanted to use up my stash for the other fabrics. Deciding that I had enough 5″ square fabrics already cut to use just a single layer around the center I Spy, I redesigned the quilt.
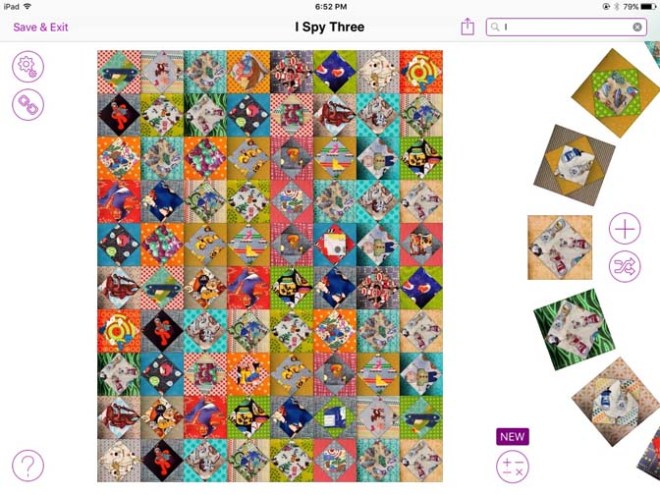
I liked the crazy off-center look of the I Spy quilts in this model. Again, after doing 30 squares I got bored and just used the same ones over and over. I was looking for the “feel” of the quilt and achieved it.
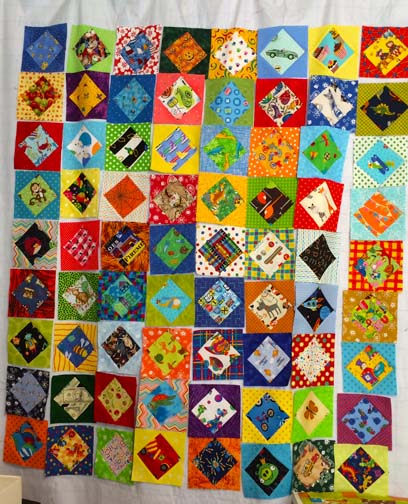
After the top was pieced and trimmed, the blocks were put on the design board and moved all around until I found the exact placement for each one. I love my design board. You can read more about it here.
To do the quilt-as-you-go, I sewed four blocks together and pressed. Using quilting spray glue, the four blocks were put onto the batting square cut just a tad larger than the 4-block square. The first half of the quilt was quilted using my Bernina and a walking foot. After the fourth needle broke, I’d had it! My birthday is less than a month from Christmas so my sweet husband, sick of hearing me scream at the machine, researched online and found a new machine for me. Here she is:
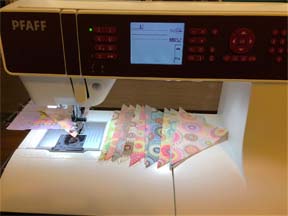
My new Pfaff! Mom bought my first Pfaff for me in the late 1970’s. It is still going strong. It sewed clothes for all four kids, grandkids, husband, me, quilts, etc. I decided I wanted something with more stitch options so I gave the Pfaff to my daughter and bought a Bernina Quilter’s machine. Never was as happy with it as I was with my beloved Pfaff. I feel as if I have my old friend back with such wonderful new features!!! LOVE this machine. What’s that I’m sewing you ask? I Spy #4!
Off topic, I just want to let all of my favorite bloggers know that I usually read blogs with my iPad. For some reason, the last 6 months or so, I can “Like” a post but it refuses to let me log on and leave comments. I really have wanted to comment how much I am enjoying my “visits” and your wonderful blogs.
 Have a crafty, happy day!

 Have a great day and keep on crafting.
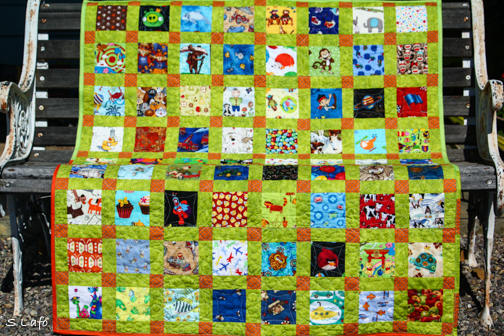

 Go have a wonderful, happy, crafty day.


 Now go and have yourself a fun-filled, crafty day!

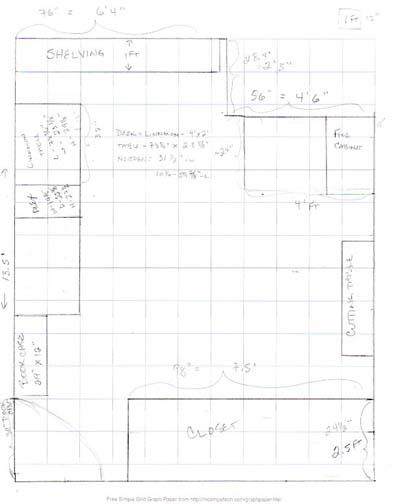 Next step was to measure the size of the room and make a floor plan. Enter design best-friend Incomtech, hurray! This site allows a person to make their own customized, printable graph paper. I was able to translate my room size 11 feet by 13 feet into a customized graph paper. The paper is 11 squares by 13 squares, each square represents a foot. If I wanted to I could have made it 22 squares by 26 squares so I’d have half foot lines. Now the floor plan was ready for the items.
 Go have a wonderful crafty day!


